The ePortfolio should accurately communicate who you are and cohesively represent what you have learned (or are learning). In order to do this, you need to start with your purpose (Boesch et al., 2015). Consider:
Why are you creating an ePortfolio?
What are your intended goals or outcomes for your ePortfolio?
What is the key message you want to convey?
The answers to these questions will guide you as you curate and reflect. If you are creating an ePortfolio for a specific course or program, a good starting place would be taking the course learning outcomes or assignment criteria and personalizing it. Personalization is important because ePortfolios are meant to be “an archive of one’s work, achievements, ideas, thoughts and feelings which reflect an individual’s intellectual, emotional and social developments- in essence they are a document of an individual’s learning over time” (Light, n.d.).
The purpose can also be the summative element, like a theme, that ties all your artifacts together. When your goals or intentions are stated clearly on the home page, your audience will better understand what you are trying to showcase and how the organizational structure of your ePortfolio works.
Another important aspect to consider at the beginning is your audience. Determining who your audience is allows you to select the appropriate voice to use, and it allows you to consider their perspective as they view your ePortfolio. This does not explicitly need to be stated anywhere on your site, but you should be cognizant of it as you begin to write your reflections. It should also relate to your purpose. For example, if you are creating an ePortfolio for future employment or potential employers, then be sure to use professional language, whereas if you are creating an ePortfolio for self-exploration, then you have the freedom to use much more casual language.
We recommend you delete this text and add your own. If you want to keep a version of this, you can clone it and then save the duplicate as a draft.
Template by Jamie Drozda and Melanie Laurie #UBCMET
References
Boesch, B., Reynolds, C., & Patton, J. (2015). ePortfolios as a Tool for Integrative Learning. In Handbook of Research on Applied Learning Theory and Design in Modern Education (pp. 439–464). IGI Global. https://doi.org/10.4018/978-1-4666-9634-1.ch021
You will need to consider both your purpose and audience in order to select and organize your artifacts. Pick artifacts that connect best with your purpose, but also think about what your audience wants to see and what you want to show them. After the selection of your artifacts, think about:
How can I group my artifacts?
Are there any patterns or themes that emerge?
Do my artifacts show a progression of learning over time?
Could I describe my learning with a metaphor?
What connections can I make between my artifacts that will allow me to create a sensible flow for my audience to follow?
Your ePortfolio organization doesn’t have to be complicated – simple is best – but you need a structure in order to determine your site navigation.
After your reflections are complete, take a look at your organization again and make sure it still makes sense. Check that your ePortfolio as a whole is a coherent ensemble of your learning.
We recommend you delete this text and add your own. If you want to keep a version of this, you can clone it and then save the duplicate as a draft.
Template by Jamie Drozda and Melanie Laurie #UBCMET
Reflection may seem intuitive; however, a deliberate thought process (Dye, 2011; Moon, 2004; Tracey & Hutchinson, 2018) greatly increases the insights found through reflection. Consider the pedestrian answer “fine” to the classic question “how was your day?” Reworking the question to “what was the best part of your day and why?” or “what would you do-over today and why?” elicits a much richer and informative response. The same is true for the reflective process.
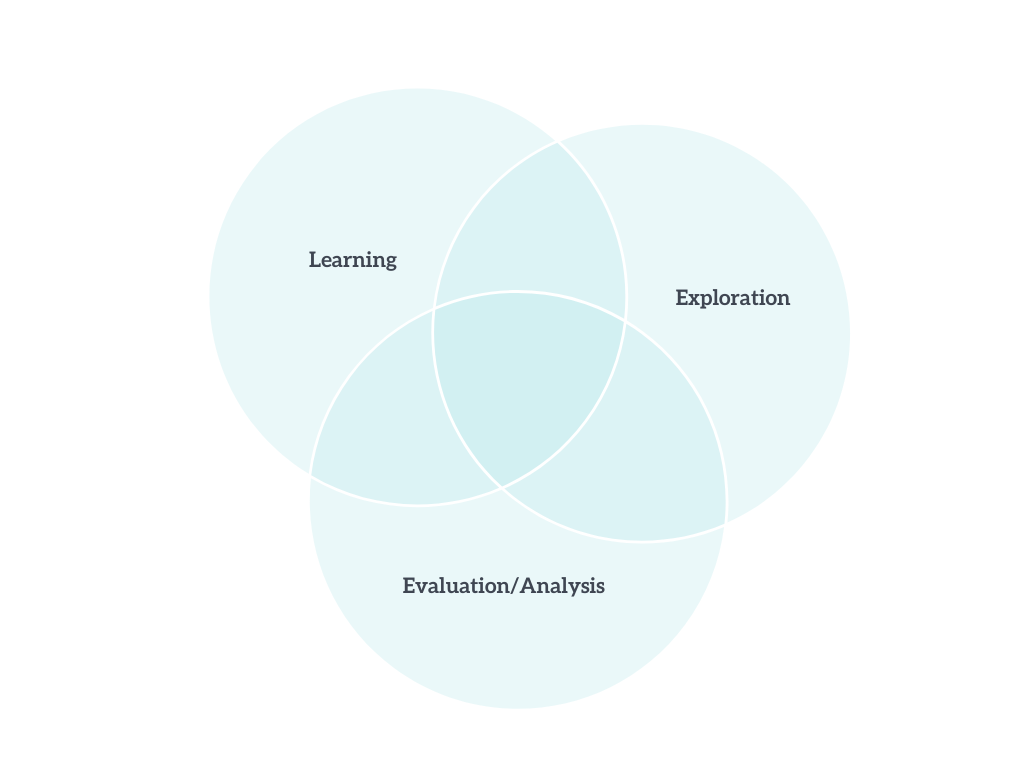
There are many different ways to reflect because there are many different reasons why reflection is needed. For example, you may want to account for what you have learned (McAlpine & Weston, 2000), or you may want to explore and generate future action based on what you already know (Tracey & Hutchinson, 2018), or you may want to evaluate or analyze what you have learned (Syed et al., 2012). Take a look at the diagram below. Each circle represents one of the above reasons for reflection. Where the circles overlap, you will notice that the color gets darker. This is to represent how the customization of different reflective prompts can lead to deeper and more profuse responses (Kirkman & Brownhill, 2020). There is no one correct way to reflect (Boesch et al., 2015; Dye, 2011); however, the more you personalize your reflective process, the more value and meaning you will be able to distill into your ePortfolio.
Figure 1. Reasons for reflection
Where do I begin?
Start your reflection with a brief description of your artifact. In addition to explaining what it is, share the context of how or when this artifact was created so that your audience can understand what work was involved. Then consider which of the following reflection prompts below you would like to answer based on which are best suited to the purpose of your ePortfolio, your audience, and your artifact.
Reflection Prompts
Click on the reason to expand the section.
Help! How do I put all my reflective thoughts together?
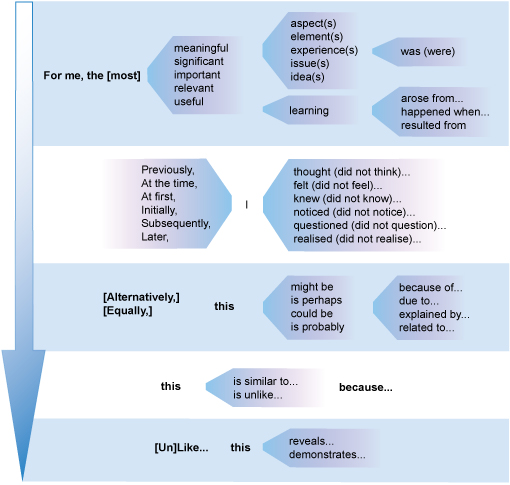
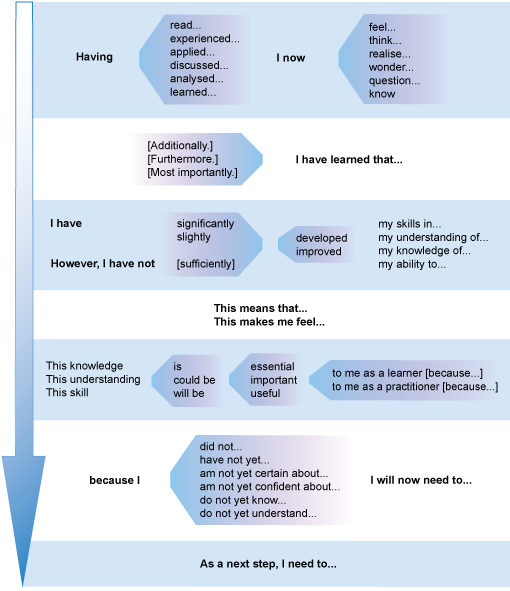
Think about what flows best. Take a look below at the reflective structures Syed, Scoular, and Reaney (2012) have developed. They have done a great job of integrating all the reasons for reflecting into one progression.
The first one is more evaluative in nature, and second one is more explorative in nature.
We recommend you delete this text and add your own. If you want to keep a version of this, you can clone it and then save the duplicate as a draft.
Template by Jamie Drozda and Melanie Laurie #UBCMET
References
Boesch, B., Reynolds, C., & Patton, J. (2015). ePortfolios as a Tool for Integrative Learning. In Handbook of Research on Applied Learning Theory and Design in Modern Education (pp. 439–464). IGI Global. http://dx.doi.org/10.4018/978-1-4666-9634-1.ch021
Dye, V. (2011). Reflection, Reflection, Reflection: I’m thinking all the time, why do I need a theory or model of reflection? In D. McGregor & L. Cartwright (Eds.), Developing Reflective Practice: A Guide for Beginning Teachers (pp. 217–234). Open University Press.
Kirkman, P., & Brownhill, S. (2020). Refining professional knowing as a creative practice: towards a framework for Self-Reflective Shapes and a novel approach to reflection. Reflective Practice, 21(1), 94–109. https://doi.org/10.1080/14623943.2020.1712195
McAlpine, L., & Weston, C. (2000). Reflection: Issues Related to Improving Professors’ Teaching and Students’ Learning. Instructional Science, 28(5), 363–385.
Syed, N., Scoular, A., & Reaney, L. (2012). Faculty of public health tips on writing effective reflective notes. Faculty of Public Health of the Royal Colleges of Physicians of the United Kingdom.
Tracey, M. W., & Hutchinson, A. (2018). Reflection and professional identity development in design education. International Journal of Technology and Design Education, 28(1), 263–285. https://doi.org/10.1007/s10798-016-9380-1
Artifacts are pieces of work that demonstrate your learning (EPortfolios: Purpose and Composition, n.d.). They can be academic, professional or interest-based. They could include:
Assignments (ungraded or graded work)
Activities/Experiences
Demonstration of abilities (or skill development)
Achievements/awards
Photographs (of projects or of you completing tasks)
Video/audio clips
Graphic data (charts, spreadsheets, timelines, etc.)
After selecting your artifacts, the next step is to reflect on them. Presenting artifacts alone is not enough evidence to show your learning. Reflection is needed to show the depth and/or breadth of what you have learned through your artifact. More on this here. Also consider how you can use media to present them.
We recommend you delete this text and add your own. If you want to keep a version of this, you can clone it and then save the duplicate as a draft.
Template by Jamie Drozda and Melanie Laurie #UBCMET
First let’s go over why menus are important. Menus determine how visitors will interact with your content. They drive navigation and without functional navigation, your ePortfolio is all but useless. Good navigation will allow your visitors to successfully search your site, and they will stay longer as they will be they will be able to find what they are looking for without extraneous scrolling or button clicking. This may sound daunting, but the only thing you need to remember is KEEP IT SIMPLE!
Visitors will read your menu from left to right so make sure the most important links come first. Also, it looks untidy if titles are lengthy so keep them short. (See Customizing Menu Items below) Short, sharp and punchy link names work best to capture your readers attention!
Most often, menus appear in the header and/or footer of a website, the default placement of your menu will depend on the theme you have chosen. Commonly the site’s menu will appear near the top of the page as a horizontal bar below the site’s title. On a mobile device, the menu may appear as a hamburger icon (three short horizontal lines) in the top left or right corner of the device.
Note: Your menu will need to be set each time you change your theme.
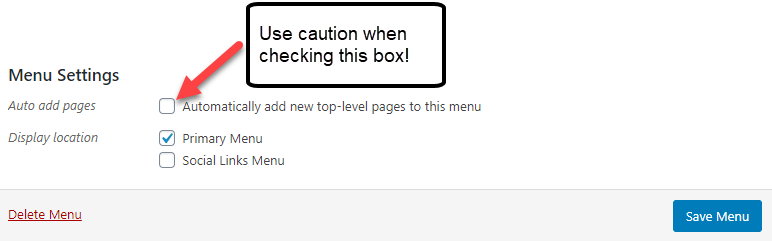
HELP! What if pages are automatically appearing in my menu!
Generally this means one of two things:
You have not defined a custom menu yet, by default WordPress will add any new pages to your menu.
You have not unchecked the option to automatically add new pages to your custom menu.
Defining a Menu
The following steps outline how to define a menu. You must define a menu before you can add items to it:
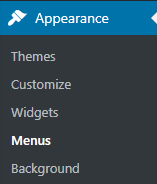
Click Appearance then click Menus
Select create a new menu at the top of the page.
Enter a name for the menu in the Menu Name box.
Click the Create Menu button.
Adding the menu to your site
If your current theme supports custom menus, you will be able to add your new menu to one of the Theme Locations.
Scroll to the bottom of the menu editor window.
In the section titled Theme locations, click the check box for the location where you want your menu to appear.
Click Save menu once you’ve made your selection.
Adding Items to a Menu
You can add different link types into your menu. These are split between panes left of the menu you’re currently editing.
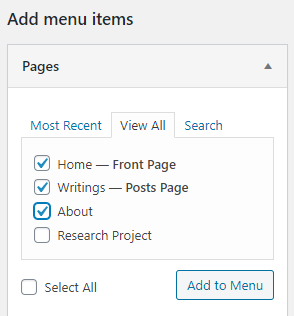
Locate the Add menu items pane. (For these instructions we will be using the Pages pane)
Within this pane, select the View All link to bring up a list of all the currently published Pages on your site.
Select the Pages that you want to add by clicking the checkbox next to each Page’s title.
Click the Add to Menu button located at the bottom of this pane to add your selection(s) to the menu that you created in the previous step.
Once all the items have been added you can drag and drop them into the order you wish for them to appear.
Click the Save Menu button once you’ve added all the menu items you want.
Customizing Menu Items
Navigation Label: This is what your visitors will see when they visit your site/blog, consider using short, sharp and punchy link names.
Title Attribute: This field specifies the Alternative (‘Alt’) text for the menu item. This text will be displayed when a user’s mouse hovers over a menu item.
Open link in new tab checkbox: opens linked page/post/url in a new tab
CSS Classes: Optional CSS Classes for this menu item
Link Relationship (XFN): Allows for the generation of XFN attributes automatically so you can show how you are related to the authors/owners of site to which you are linking. See Link Relationship for details.
Description: Description for this link. The description will be displayed in the menu if the current theme supports it.
Move: moves the item within the menu
Original: A link to the original item, don’t forget to save your changes before you navigate away from the menu
Remove/Cancel: Remove, removes the item from the menu, it does not delete the page/post. Cancel, cancels the custom changes you have made to the item
Creating Drop-down (Multi-level) Menus
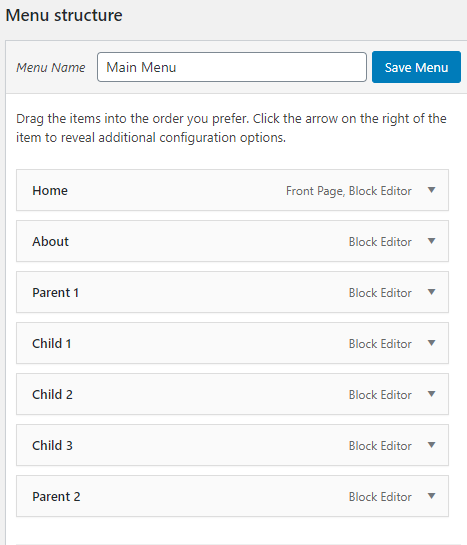
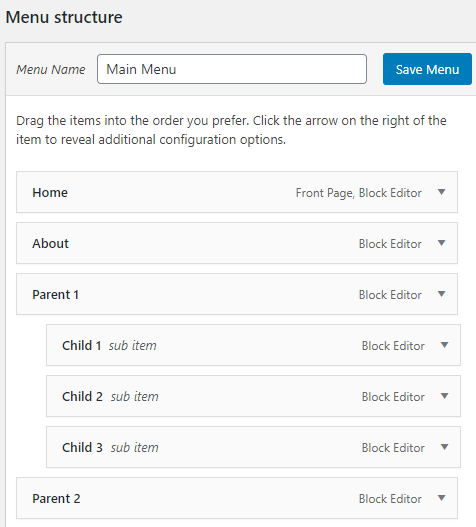
Using drop-down menus keeps your sites navigation simple and clean. We caution on going too deep as it can be frustrating for people who are accessing your site on a mobile device. If possible, keep your menu structure to 2 levels. When planning your menu’s structure, it may be helpful to think of each item as a heading in a report. Imagine creating the table of contents for this report: All the level 1 headings are nearest to the left, level 2 headings are slightly indented to the right, level 3 headings are indented even further to the right. WordPress has a simple drag and drop interface for creating drop-down menus. If you have not ordered your menu items by dragging and dropping into the correct order as indicated in step 5 of Adding Items to a Menu you should do so now.
To create a drop-down list in your menu you need to position the “child” under its “parent.” The following instructions outline how to create drop-down (multi-level) menus:
Ensure the menu items are in the correct order.
Position you mouse over the “child” menu item.
Hold the left mouse button down and drag the item to the right, release the button.
Repeat steps 2 and 3 for each child item.
Click the Save Menu button.
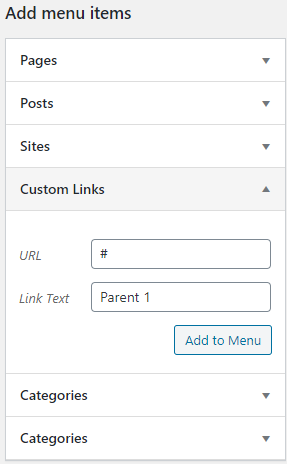
One final thought, what if you want the “parent” to only be a label, text only? You can have a “parent” menu item be just text, here’s how:
From your dashboard click Appearance > Menus
Below the heading Add menu items select Custom Links
All WordPress themes provide two options for adding content: you can choose to add content to a page or you can choose to add content to a post. Some themes offer a third option and is often titled Portfolio. Portfolio is a custom post type that the theme developers have created. If you’re using a theme with this option, check out the themes documentation to see what kind of cool stuff you can use it for! For now, let’s focus on pages and posts.
What do you mean pages and posts? Aren’t they the same? They look the same and they have nearly the same editing interface! What’s the difference?
Pages vs Posts
Pages and posts are where you’ll create the content that makes up your ePortfolio. Don’t worry, we too struggled with understanding the differences between pages and posts when we were new to WordPress. The biggest difference between pages and posts are that posts are timestamped, whereas pages are timeless.
Pages are for static content. They do not have a publish date. Use pages when it does not make sense to list the content by date because you want your visitors to always be able to see that content in that spot, no matter when they visit your ePortfolio. Most themes support comments at the bottom of pages.
Posts are for timely content. They have a publish date, and they are displayed in reverse chronological order on your site’s blog page. Older posts can “fall off” the blog page (the content is still kept, but no longer visible). Posts are what you should think of when you hear the term “blog post.” All themes have a link to comments, and this is where readers can click to write a comment in response to your post. This may be a handy way to receive feedback from your peers! Also, you can categorize your posts, which is useful to help readers locate posts on your blog.
Below are key differences between pages and posts:
Properties of a page
Pages are displayed independently of post history and are more static. They remain the same from day to day since they are rarely updated
Normally used for information that you want to share with readers but don’t expect to update frequently.
Pages don’t have time stamps so don’t show the date they are published.
You can change the order pages appear.
You can’t assign category and tags to pages.
Pages don’t appear in RSS feeds so readers need to visit your blog to view latest page updates.
You can create sub-pages which you assign to a parent page to create nested pages.
Properties of a post
Blog posts appear in reverse chronological order so that the most recent posts is the first post that your readers see.
Post are dynamic and updated regularly.
Posts have a time show which displays the date and time the post was published.
You can assign categories and tags to posts which make them easier to find.
Posts appear in RSS feed so readers who subscribe to your blog will receive your latest post in their RSS reader.
Posts display the name of the post author.
(Differences Between Posts and Pages, 2019)
Categories and Tags
Now that you understand the differences between pages and posts, you my be wondering what categories and tags are. Categories and tags are two ways to group your content. Categories are meant for broad grouping, similar to a table of contents. All WordPress posts must be filed under a category. Tags are meant to be granular and descriptive. They can be used to describe specific details of your posts. They are not required for every post. For more detailed information about categories and tags, check out the Beginner’s Guide for WordPress page outlining categories vs tags at: https://www.wpbeginner.com/beginners-guide/categories-vs-tags-seo-best-practices-which-one-is-better/
Let’s get practical
All of this is great information, but how do you add new pages and posts and how do you edit them? What about media and accessibility? Follow the link below to learn more.
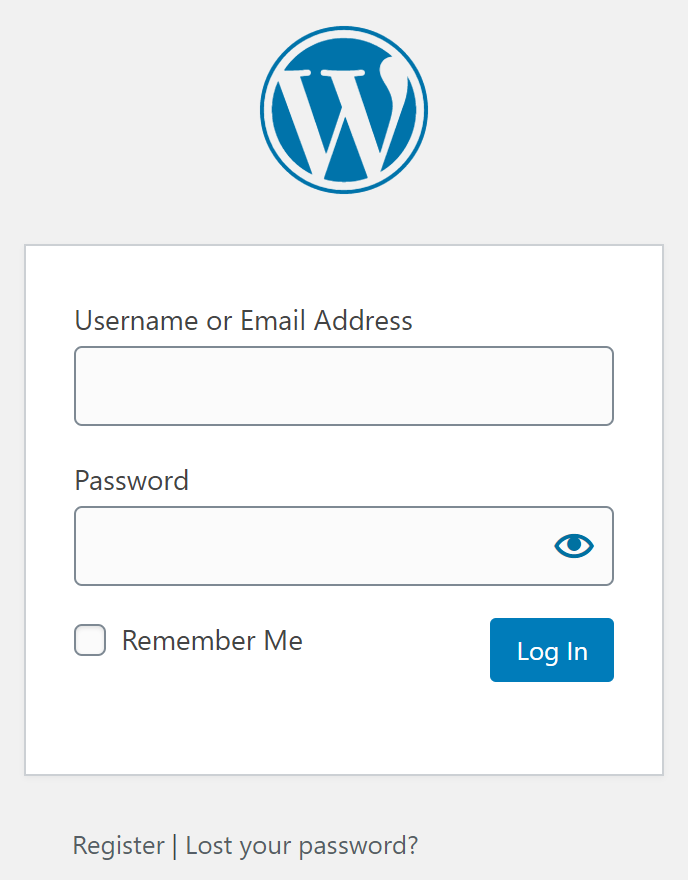
The first step to adding a new page or post is ensuring you are logged into your WordPress site. To login add /wp-login.php to the end of your url and click enter, for example: https://yoursite.trubox.ca/wp-login.php. Adding /wp-login.php takes you to the login screen, enter your credentials and click the Log In button, after click Log in you will be redirected to your sites dashboard. Please note that for security reasons we do not recommend clicking the Remember me checkbox, committing your credentials to memory is always best! If you forget your password click the Lost your password? link.
Log in
From your sites dashboard:
Adding a Page
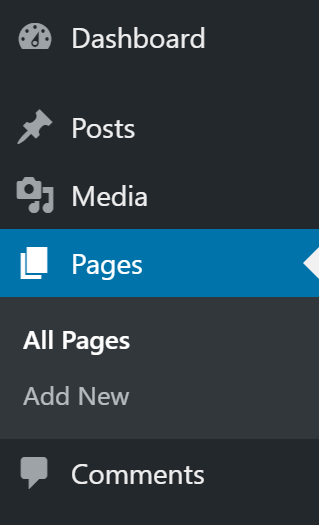
To add a new Page, click the Pages menu option and then click the Add New link underneath or hover your cursor over the Pages menu option and click the Add new link in the fly-out menu.
Add New Page
Adding a Post
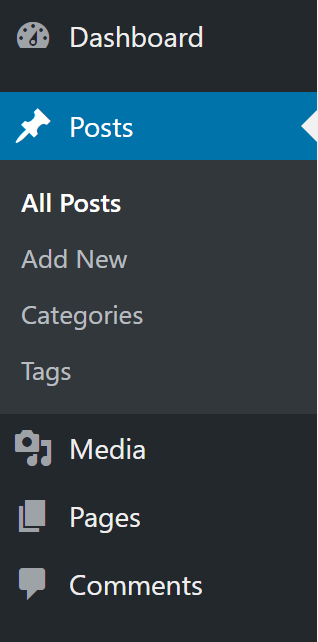
To add a new Post, click the Posts menu option and then click the Add New link underneath or hover your cursor over the Posts menu option and click the Add new link in the fly-out menu.
Add New Post
And, of course, there’s another way for adding a page or a post! After you have clicked on either Pages or Posts you will notice an Add new button at the top on the right side of the Dashboard menu link. Our advice is to choose the method that feels most natural to you, in the end they all accomplish the same task.
Using Blocks
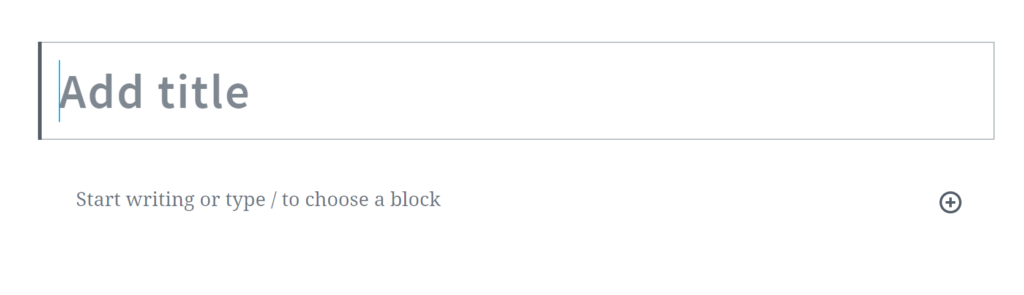
The first thing you want to do is give your page or post a title using the Add title field at the top of the editor, after that you can start adding content. If you are simply adding text you can start typing or copy and paste text into the Start writing or type / to choose a block field. To add columns, media, headings, quotes, buttons, or pretty much anything else you can think of click the Plus icon to select a Gutenberg block.
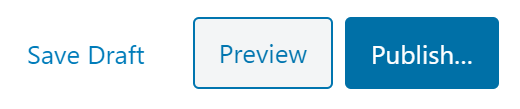
Note: You must click Save Draft or Publish…, located in the upper right, to save your new page or post! We recommend clicking Save Draft or Update often so you do not lose your work. (The Publish… button converts to Update)
Take a look at the upper left side of your screen, if you click the Plus icon a navigation pane that lists all of the Gutenberg blocks will appear. You may find it handy to keep this open so you can quickly select a block and keep on editing! While your up there check out the other options: the WordPress icon on the left side of the Plus icon takes you back to the Admin menu, the pencil icon offers you a tool selection, the left and right arrows allow you to undo and redo your most recent changes, the i icon shows you your pages content structure and the 3 lines shows displays block navigation.
After you have added a new page or post you will likely want to go back and edit or update it. The first step is to login to your WordPress site (login instructions are above)
From your site’s dashboard:
Editing a Page
To edit a Page, click the Pages menu option and then click the All Pages link underneath or hover your cursor over the Pages menu option and click the All pages link in the fly-out menu.
Add New Page
Editing a Post or Portfolio
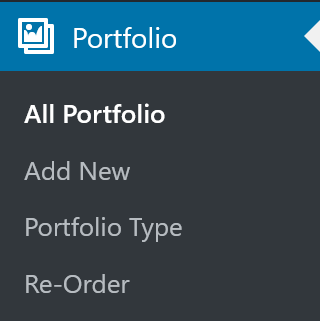
To edit a Post, click the Posts or Portfolio menu option and then click the All Postsor All Portfolio link underneath or hover your cursor over the Posts or Portfolio menu option and click the All Postsor All Portfolio link in the fly-out menu.
Add New Post
Now you should see a list of all your pages or posts, hover over the page you want to edit and click Edit from the menu that appears below the page’s or post’s title. You will be taken to the page or post in edit mode so you can make the necessary updates.
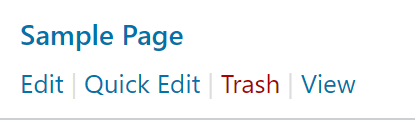
Page or Post Menu
Let’s take a minute to go over this menu, Edit takes you to edit mode, Trash deletes the page, View let’s you view the page, Quick Edit let’s you do some cool stuff! Let’s take a look at the Quick Edit menu for pages and posts.
Page Quick Edit Menu
The image above is displaying the quick edit menu for a page. Here you can change the title and slug (the slug is what displays in the URL, e.g. https://www.yoursitetitle/sample-page). You can change the date the page was created on, password protect the page or make it private, allow comments, revert it to draft or publish it. You can assign it a template, you can create your own template but we will stick to the default or use one that comes with the sites theme. You can also assign the page as a parent page (consider your site’s navigation here as this will drive your breadcrumb trail).
When you are in edit mode of a page or post you will notice these options are available to you on the right side of your screen. If they are not, you are seeing the properties of the block you are editing. Click on Document to show the pages properties. Again, while you are checking out the right side of your screen, look at the options available to you for each block you’ve added. Play with them, have some fun, see what you can do!
There’s one more option for getting to edit mode, but you need to be logged in for this menu to display. If the page or post is published and showing on your site then you can navigate to the page or post and click the Edit Page (Edit Post) link that is located in the menu bar at the top of your screen.
WordPress Menu
We recommend hovering over all the menu links to familiarize yourself with them. You’ll notice when you hover over + New that you can add a new page or post as well as upload media. WordPress provides many ways to do the same task and the best way is the one you like!
Adding Media to WordPress
Using different types of media to represent your artifacts is a great way to make your ePortfolio dynamic and keep your audience engaged. Text-heavy pages can get cumbersome regardless of how you arrange it. Media can help with breaking up content or replacing text all together. Consider how you can “show what you know” rather than just simply telling. Media can also be an alternative to simply hyperlinking all your artifacts. Instead of sending your audience off to another site or tab, media can be embedded to keep your audience contained to your page. Some options can include:
Photos or Videos
You do not need to create everything from scratch. There are many sources that provide professional-looking, royalty-free images and video.
When it comes to creating videos, there is a lot you can do with your smartphone’s camera. If you need to record your screen, but don’t have screen capturing software, then consider using a web-conferencing tool (like Zoom), and record your screen share. As for screen capturing tools, there are many freemium web-based ones or Chrome extensions that are very user-friendly. Just do a Google search and find one that works for you.
Infographics
If you are looking to create something visual, but still informative, infographics can do just that. Here are a few free (or freemium) web-based graphic design tools that are very user-friendly:
Maybe some of your work might have more impact spoken or heard. Whatever the reason, don’t rule out audio as a form of media. To record, you can use the voice memo app on a smartphone and upload the mp3 file directly to WordPress. Alternatively, you can use a web tool like Soundcloud https://soundcloud.com/ to record, edit and save. Soundcloud easily embeds into WordPress by simply copying and pasting the URL on to your page/post.
Embedding PDFs
Since papers are common items to artifact, embedding PDFs right into your website is a good option in comparison to linking them, which requires the audience to either open it in a new tab or download it. We have the PDF Embedder plugin which you can use. To activate the plugin, from your dashboard click the Plugins link. Next, search for pdf in the Search for installed plugins… text box and finally click Activate for the PDF Embedder plugin. The PDF Embedder block will now be added to the Blocks list when you click the Plus icon.
In order for any media to display on your site, it needs to be uploaded. The first step is to ensure that your media is downloaded to the computer or device you are are using to update your site with. If your media is stored on an external hard drive make sure it is plugged in!
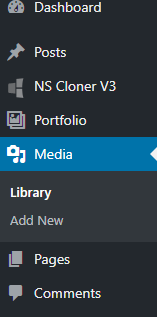
Next, to upload your media via the Media link on your dashboard, click the Media menu option and then click the Add new link underneath, or hover your cursor over the Media menu option and click the Add new link in the fly-out menu.
Add New Media
To add your media to a page or post, go to edit mode for that page or post (see Editing/Updating Pages and Posts). When you select the image, audio, video, cover, or gallery blocks you will be presented with the option to upload media (add new media as described above) or to select media that has already been uploaded to you media library. Click Upload if the media has not been added to the Media library and click Media Library (learn more about the Media Library at: https://wordpress.org/support/article/media-library-screen/) if the media has already been uploaded. The image, video and audio blocks give you a third option Insert from URL. Be careful with this one, it is not what it seems. Here is an example of a URL that will display an image: https://www.tru.ca/__shared/assets/Logos-01_-TRU_Logo_Left_900px37269.png. Essentially, the insert by URL lets you hotlink to an image. Below is an image of the video block.
Add New Video Block
Accessible Design
Accessibility is important. Designing with the audience experience in mind will make your site more user friendly and inclusive for more visitors. When you think about accessibility, think beyond people using assistive technologies such as screen readers. Also think about mobile users and search engine robots. Most WordPress themes have taken accessibility into consideration when designing the theme, so you do not have to much to worry about. Below is a list tips that outline the design choices you are in full control of:
Headings Headings are important as they allow search engines to index the content and structure of your web pages and they allow your visitors to skim your pages. Headings are defined as H1, H2, H3, H4, H5, H6. Heading 1 (H1) should be used for the pages main heading, followed by heading 2 (H2), heading 3 (H3) are less important, and so on.
Alternative text Whenever you add an image, always fill in the Alt text (alternative text) field with a description the object. If you do not fill in the Alt text field, your images will be inaccessible to visitor using screen readers.
Use clear language You should always use clear language that is easy to understand. You can accomplish this by keeping your sentences short, avoid using dashes (write H1 to H6 rather than H1-H6), use whole words (write January rather than Jan), and finally avoid slang.
Writing good links Your links should be descriptive so that visitors know what information they will get by clicking on the link. Avoid hyperlinking text that simply reads “click here,” “read more,” or “here.”
Contrasting colors Using contrasting colors makes reading text easier on the eyes. This is why the default is black text on white background. Use color to draw attention to a specific point or idea. Color, especially in background, can be used to set the mood, but be careful the intensity. The brighter it is, the more attention it may draw and the harder it can be to read. Consider what you want your audience to focus on: your content or your background?
These high level guidelines will help to make sure your site is user friendly. However, there are many more, for example, providing transcripts for audio and ensuring your site is fully functional from a keyboard. Check out the sites listed below to learn more about accessibility:
Finally, if you are keen to know how accessible your web pages are you can run them through Wave’s Web Accessibility Evaluation Tool at: https://wave.webaim.org/
Academic Integrity
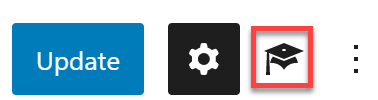
Copying and pasting is a very convenient method of transferring information, but it is imperative that you do not forget to cite your sources. Your audience will assume that the content on your site is yours unless you explicitly specify otherwise, and if they are not all your words or ideas originally, you are plagiarizing. WordPress has a helpful citation manager plugin that can help you with referencing. We have activated the Academic Blogger’s Toolkit for you. You can access the Academic Blogger’s Toolkit by clicking the Graduation Cap icon in the upper right corner of your screen.
Academic Blogger’s Toolkit
It is super easy to use especially if you have a DOI to the article. All you need to do is enter the DOI and the plugin fill in the fields. You can even import references from other citation managers such as Zotero. There are a few little annoying things to take note of, such as you cannot edit the inline citations, if you use a direct quote you need to cite it manually and you need to add a citation to the article before it will show on the References list. Other than that we really like it. For instructions on how to use the plugin we recommend going to the plugins documentation wiki at: https://github.com/dsifford/academic-bloggers-toolkit/wiki. To review some custom instructions check out: https://trubox.ca/plugin-academic-bloggers-toolkit/.
Wait! How did you do that?
Formatting Lists
When we want to add text below a bullet without adding a new bullet, you will notice that if you hit the enter key then the backspace key, you only to get frustrated that you are back on the line you just left! Here is a handy tip: click Shift+Enter to start a new line without adding a bullet, and when your ready for another line with a bullet click Enter (as normal).
This is my first bullet (click Shift+Enter) this is my line of text without a bullet (click Enter)
This is my second bullet
Page Jumping
You may be wondering how we were able to create links that jumped up or down the page from the table of contents at the top. This is called page jumping and it is great way to link your visitors from one part of content to another and is especially handy for long pages such as this one. To add a page jump click on the heading you want to jump to and add a HTML Anchor in the Advanced field. Now you can link some text to your anchor, highlight some text or add an image and select the link option from the block’s toolbar and type in # immediately before the HTML Anchor. Note that anchor links do not work in preview mode or draft mode but they will work once the page or post is published! For detailed instructions regarding page jumps go to: https://wordpress.org/support/article/page-jumps/.
Paragraphs
Click Enter to quickly start a new paragraph. This may seem like a silly set of instructions but it is something we have to think about when editing using Gutenberg blocks.
We recommend you delete this text and add your own. If you want to keep a version of this, you can clone it and then save the duplicate as a draft.
Template by Jamie Drozda and Melanie Laurie #UBCMET
If the plugin is not already activated, activate the H5P plugin:
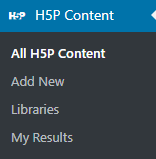
Click H5P content
Click Add new
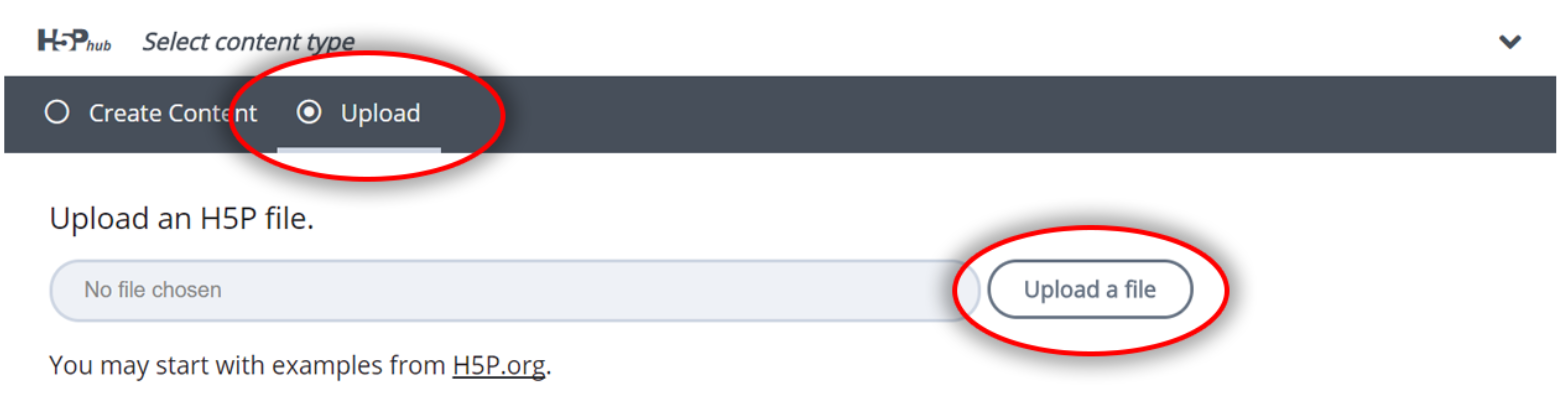
Please note: You may have to click “Select content type” to open the H5P hub.
To reuse a .h5p file click “Upload” then click the “Upload a file” button to navigate to your file, select your file and click “Use” the editor will load and you will be able to start edit the H5P content. Don’t forget to click Create and when editing the content remember to click Update often!
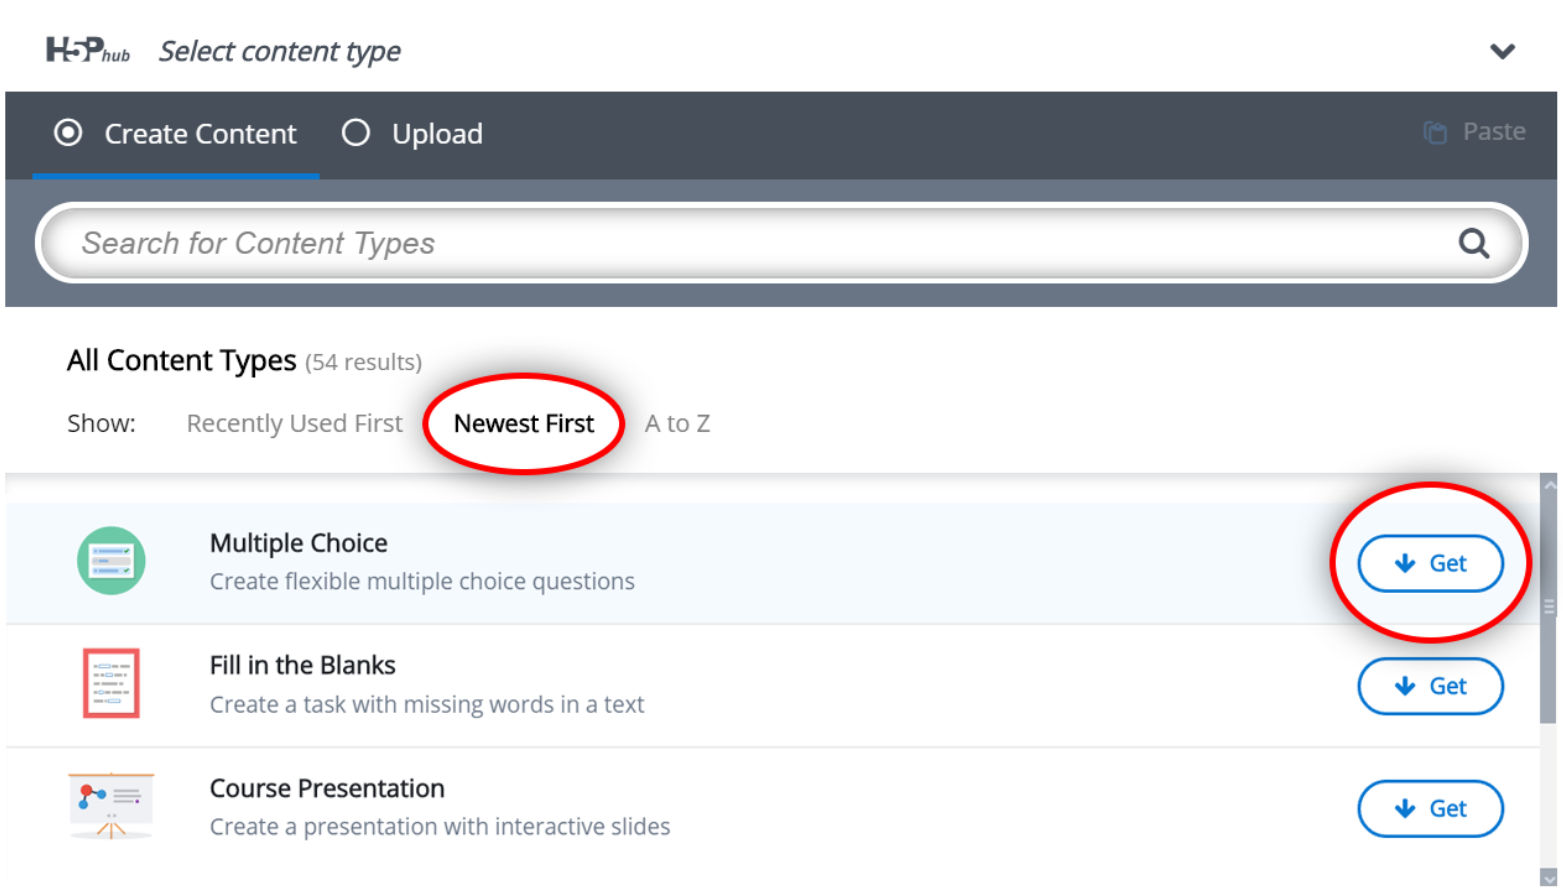
To create a new H5P content you need to install content types first. Below are the instructions on how to do this using the H5P Hub.
Select “Newest first” – you will get the list of all content types ordered by the date of the release. Click “Get” on any content type to proceed to the Content type details page.
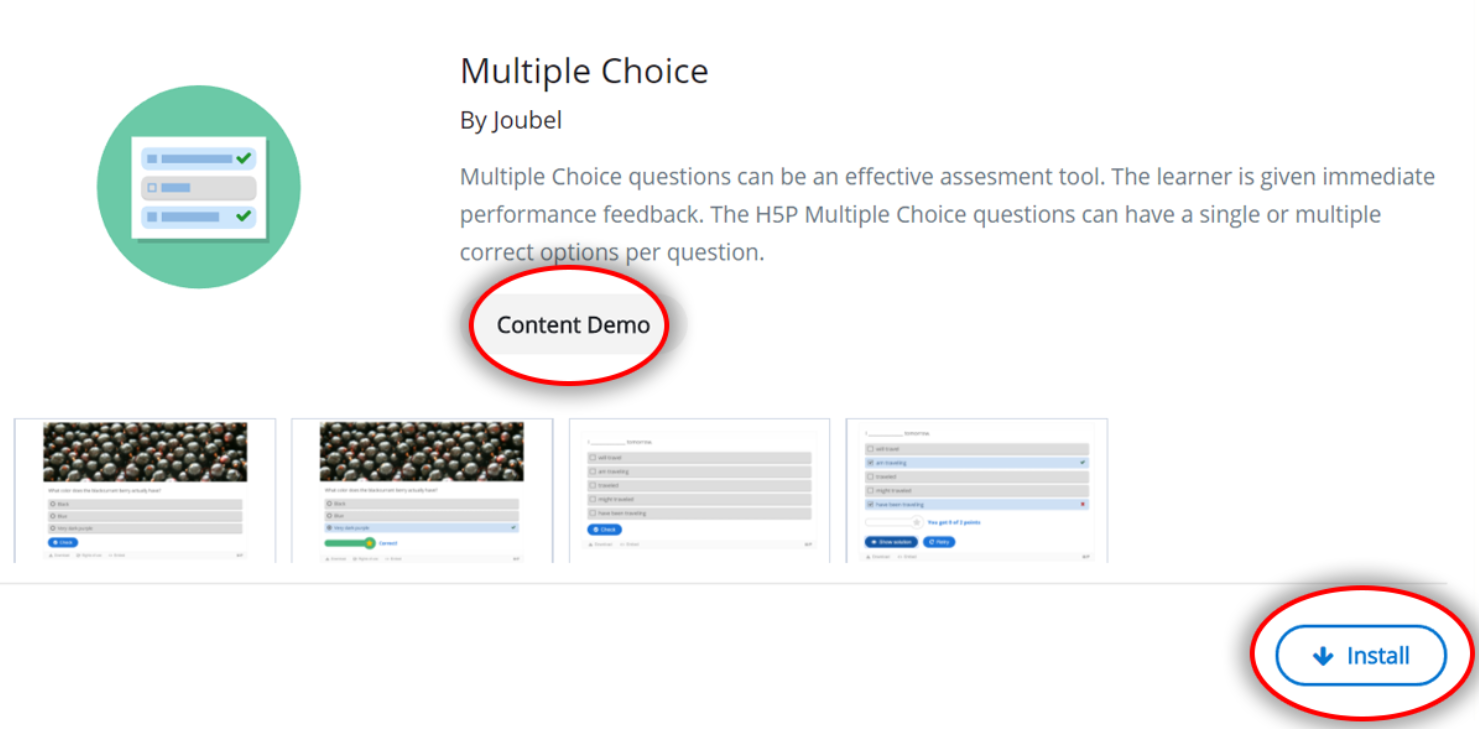
On the Content type details page you can read the details about each content type, see the screenshots and example content. Click “Install” to install the selected content type.
Click “Use” to open the editor and start creating the content. Note: if the content type is already installed you will skip the steps above and only have to click “Use“
Editing H5P Content on Your Site
After uploading or creating new H5P content you may want to edit it, you can do so using the built-in editor.
Go to H5P Content > All H5P content and click Edit for the activity you want to edit.
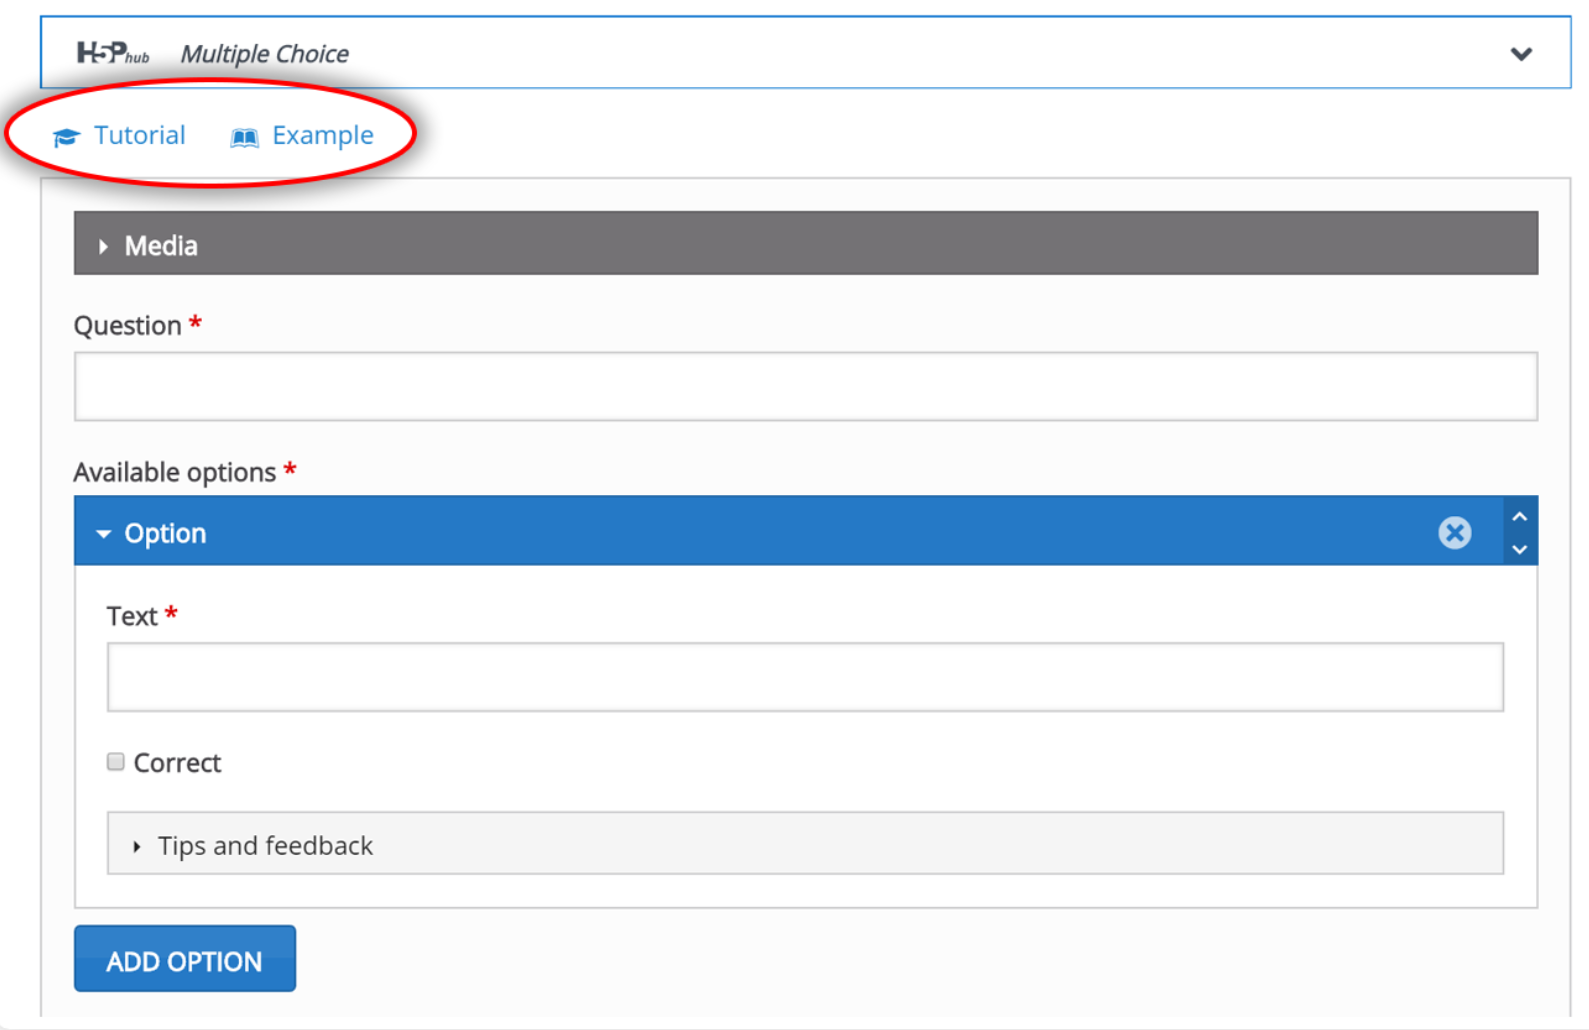
The following image shows you the editor for Multiple Choice, use “Tutorial” and “Example” links at the top to learn more about this content type and to see some examples of usage. (These links are available on all content types and will take you to the corresponding documentation!)
Best Practices (and tips!) for Creating and Using H5P Tools
Finally, let’s go over some best practices and a few handy tips.
Keep in mind that H5P tools are meant to be reused, remixed, and shared. H5P believes in working together, learn about the H5P OER HUB at: https://h5p.org/oer-hub-coming
H5P authoring tools allow you to add copyright information whenever you insert media. You may also want to consider adding source materials to your references list if there is a specific referencing format you need to use.
Remember to use best practices for accessibility, use contrasting colours and assign alternative text (“alt-text”) when prompted so that screenreaders can read your content.
H5P prefers a modern browser like Chrome, Firefox, or Safari.
Finally, remember that your interactive won’t be saved until you click “Create” and edits won’t be saved until you click “Update.”
Image Sliders – allows you to create responsive displays of your images that look great on all devices. All you need to do is upload your images, alternative text and if applicable copyright information.
Image Hotspots – allows you to create a responsive info-graphic with interactive hotspots. Hotspots may contain text, images and videos!
Timeline – allows creatives to create a multimedia rich interactive timeline to place a sequence of events in chronological order.
Course Presentation – allows you to embed an interactive “PowerPoint” presentation that is complete with many different types of questions, backgrounds, images and videos. You can even use images to jump to new slides!
We recommend you delete this text and add your own. If you want to keep a version of this, you can clone it and then save the duplicate as a draft.
Template by Jamie Drozda and Melanie Laurie #UBCMET


